The second trimester encompasses the glory days, or the so-called “honeymoon days”, of pregnancy. Your morning sickness has probably passed (or will do so soon), you may find yourself more energetic, and your belly is growing but hasn’t yet begun to hamper your ability to move freely. This is the time to get into the rhythm of your regular yoga practice on your own if you are a seasoned yogi, or by attending prenatal yoga classes if you are new to yoga. In addition to making you more physically comfortable in the months ahead, prenatal yoga classes are a good forum for meeting other pregnant women. The sense of community and support is a major benefit of a prenatal yoga class, one that is at least as important as the physical aspect.
8 Tips for yoga during Second Trimester
1. Be gentle with yourself and respect your body’s boundaries. Your joints are beginning to loosen up now, so sink into yoga positions slowly and carefully. Hold poses only for as long as you’re comfortable. Take your time, and don’t push yourself to the point of pain or exhaustion.
2. Listen closely to what your body needs. Be aware that your slowly expanding belly will affect your sense of balance. Practice standing poses, with support if needed. Keep a chair or keep near to the wall, and make sure that you have the support nearby if you suddenly feels dizzy or weak. Learn and decide how to modify the poses so that you are in control of the practice; this will encourage you to listen to your body and build confidence in your ability to cope with your pregnancy.
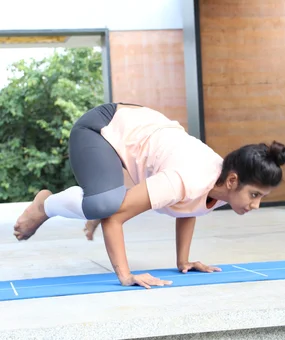
3. Don’t strain your abdominal muscles. Avoid poses that strain or put pressure on the abdominals like Navasana (Boat Pose) and Plank Pose.
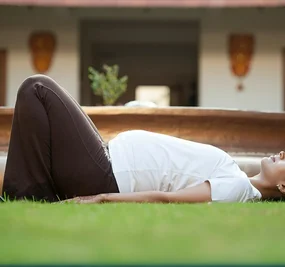
4. Limit the time you spend on your back. Avoid lying on your back, as it can put pressure on your inferior vena cava (the vein that returns blood from the legs to the heart) and reduce blood flow to your uterus. It can also make you feel dizzy and cause shortness of breath and nausea. Use a bolster or pillows to raise your upper body when you’re lying down. Or limit the time you’re flat on your back to one minute, and roll over onto your side for 30 seconds between each exercise on your back. Use pillows to raise your upper body when you’re lying down.
5. Be mindful of your belly. Remember to twist with the help of shoulders, and modify forward bends by bringing your legs wider apart to make space for your growing belly. This extra space will also provide greater stability during standing poses.
6. Explore new ways of practicing. Most asanas can be modified for different body shapes and ability levels. If you are missing back bends or inversions, talk with your prenatal yoga teacher and explore asanas that will give you the satisfaction of a contraindicated pose, but are less demanding on your changing body.
7. Practice with your baby. Include your baby in the practice, especially during relaxation. By the fifth month, you are very aware of your baby’s movements. Often, your baby will be more active during your quiet periods, so connect with your baby during relaxation poses. It is important to rest and allow your body to recuperate after a practice.
8. Focus on the mental aspect of yoga over the physical. By backing off from strenuous poses and concentrating on turning inward, you will enjoy the middle trimester much more, and you will prepare well for the intense focus required in labor and delivery and, eventually, motherhood.
Yoga poses during second trimester (13 to 27 weeks)
You can still safely enjoy all of the poses you practiced during the first trimester, and add more asanas to your practice as well.
1. Kantha and Skandha Sanchalana
Roll your head back and forth, right and left, and in circles clockwise and counterclockwise along with slow gentle breaths. Similarly, rotate your shoulder blades back and forth, up and down, clockwise and counterclockwise. Do each movement 3-5 times.
Benefits
Do this with soft and easy breaths to releases tension from head, neck and shoulder area.
2. Ardha Baddha Konasana
Sit with your legs outstretched. Fold your right leg and place your right foot as far up on the left thigh as possible. Place your right hand on top of your folded right knee. Hold the toes of your right foot with your left hand. While breathing out, gently move your right knee up towards your chest. Breathing in, gently push your knee down towards the floor. Make sure that you are keeping your torso straight. Repeat with your left leg. Slowly practice about 10 up and down movements with each leg.
3. Baddha Konasana
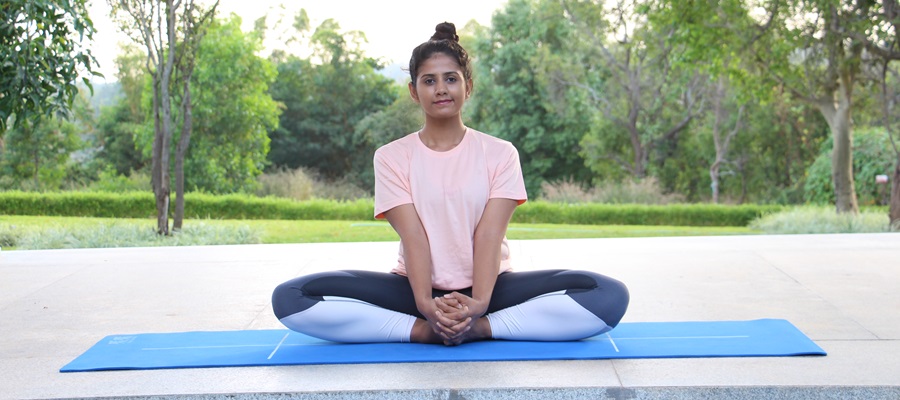
Sit with your legs outstretched. Bend your knees and bring the soles of the feet together, keeping the heels as close to the body as possible. Fully relax your inner thighs. Hold your feet with both hands. Gently bounce your knees up and down, using the elbows as levers to press the legs down. Do not use any force. Repeat up to 20-30 times. Straighten your legs and relax. Read more about Badha konasana.
Benefits
The half and full butterfly poses are excellent for loosening up the hip joint, and can increase blood circulation to the pelvic floor and help a woman get used to the feeling of opening up. They also help relieve tension and tiredness from inner thigh muscles and legs.
4. Vajrasana
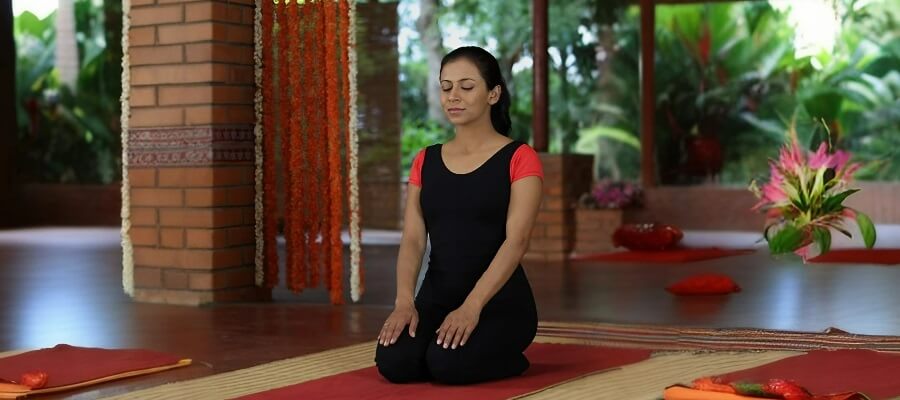
Benefits of vajrasana.
Kneel on the floor. Bring your big toes together and separate the heels. Lower your buttocks onto the inside surface of the feet, with your heels touching the side of your hips. Place your hands on your knees, palms down. Your back and head should be straight , but not tense.
Benefits
Strengthens the thigh muscles. Enhances digestive functions, and can be practiced directly after meals. Relieves stomach ailments like acid reflux, a trouble often faced during pregnancy. Alters the blood flow and nervous impulses in the pelvic region and strengthens pelvic muscles. Assists women in labor.
5. Marjariasana
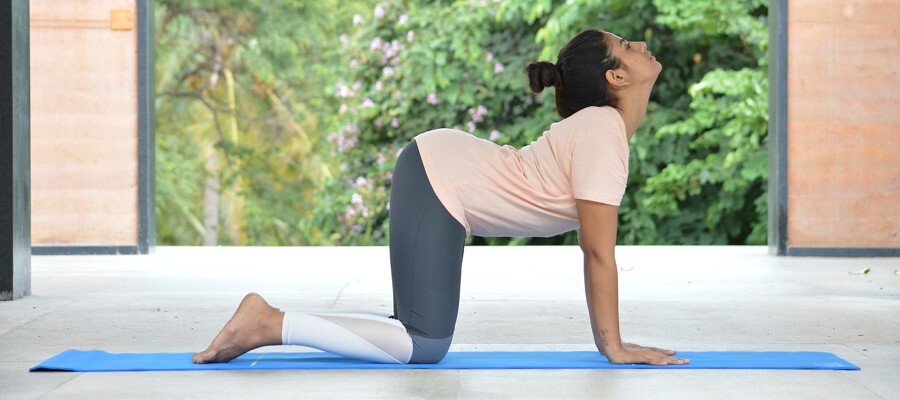
Come onto your palms and knees, with your palms shoulder-width apart below your shoulders, and your knees hip-width apart below your hips. This is the starting position. Inhale while raising your head and gently arching the spine towards the floor. While exhaling, bring your chin towards your chest, and gently arch the spine upward. Repeat for 5-10 times. Be careful not to strain yourself.
learn more about Marjariasana.
Benefits
This position improves the flexibility of the neck, shoulders and spine, and tones the female reproductive system. Can be safely practiced during first 6 months of pregnancy.
6. Mandukasana
Sit in Vajrasana (as above). Separate the knees as far as possible, while keeping the toes in contact with the floor. Separate the feet just enough to allow the buttocks to rest on the floor. Try to separate the knees. Do not strain.
Benefits
Same as Vajrasana.
7. Paschimottanasana
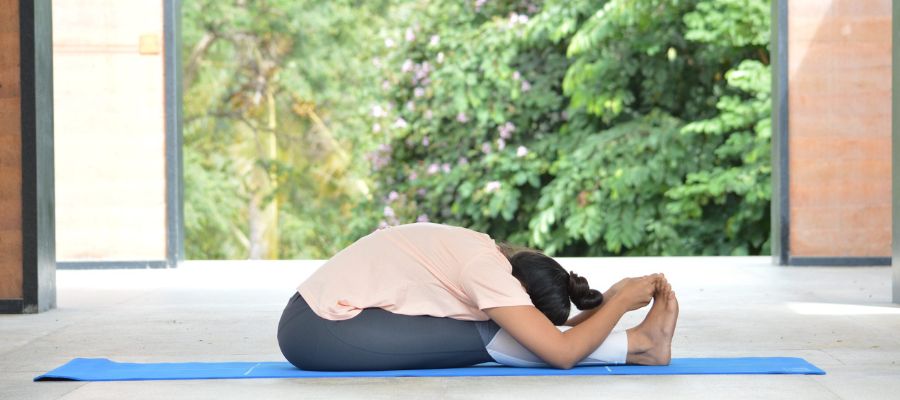
Sit tall with your legs stretched out and your toes flexed inwards. If necessary, separate the legs to to avoid any pressure on the belly. Inhale, and, raising both arms above your head, stretch up. Exhale, gently bending forward from the hip, but not fully. Keep your spine erect, moving toward the toes rather than toward the knees. Place your hands on your legs, wherever they reach. Stretch your arms out in front. Inhale, and come back up to the seated position. Exhale and lower arms.
Benefits Of Paschimottanasana
Stretches the lower back, massages the abdominal organs, and tones the shoulders.
More Benefits Of Paschimottanasana
8. Adho Mukha Svanasana
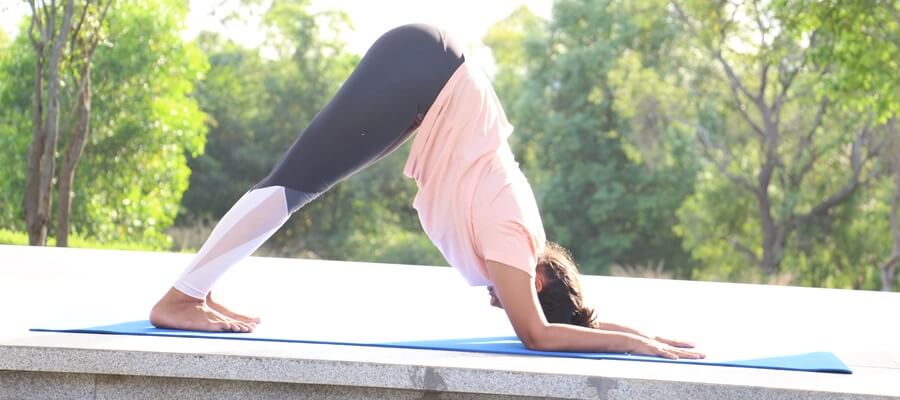
Come onto all fours. Breathing out, lift your hips up. Straighten your knees and elbows, forming an inverted V-shape with your body. Hands should be shoulder-width apart, and your feet should be hip-width apart and parallel to each other. Keep your knees slightly bent. Hold. Take gentle breaths. Exhale. Bend the knees, and return to table pose. Relax into child pose.
Read how to do Adho mukha svanasana
Benefits
Aids digestion, respiration and mental clarity. Strengthens legs.
9. Shishu asana
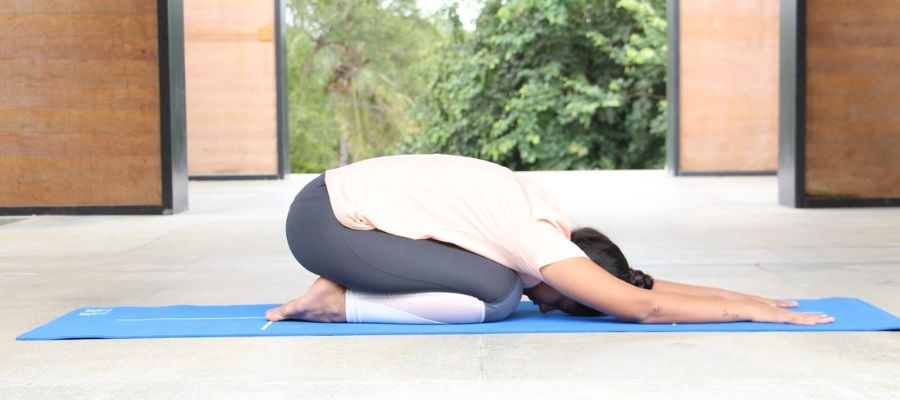
Come back into Vajrasana again, keeping your knees and thighs separate, and gently bend forward, placing your forehead on floor or on the cushion in front. Extend arms forward, palms pressed into the floor. Rest with gentle breaths. If you are not comfortable with this, you can modify it into Puppy Pose by lifting your buttocks up and stretching the hands further.
Benefits
This is a great shoulder and chest opener and creates a lot of space in the torso.
More benefits of Shishuasana.
10. Tadasana
Stand with your feet together and your arms at your side. As you inhale, raise your arms over your head, interlock your fingers, and then turn the palms upward. As you exhale, place your hands over your head. Inhale and stretch your arms, shoulders and chest upwards. Stretch your whole body from top to bottom. While exhaling, bring your hands on top of your head. Relax for few seconds, and repeat the whole round 5-10 times.
Learn more about Tadasana.
Benefits
Helps develop physical and mental balance. The entire spine is stretched and loosened, helping the back to stretch and relax.
11. Urdhva Hastasana
Stand with your feet together and arms by your sides. Breathing in, extend both arms overhead. Gently stretch up. Breathing out, release the stretch.
Next, extend both arms overhead. Breathing in, gently stretch your right arm longer than your left, and then, breathing out, release the stretch. Breathing in, gently stretch the left longer. Breathing out, release the stretch. Keep alternating between the right and left arms for 5 rounds at a moderate pace. Bring your arms down and relax.
Benefits
Removes stiffness from the shoulders and upper back. The deep, synchronized breath improves breathing capacity. Influences heart and improves blood circulation. The whole body, especially the brain, receives an extra supply of oxygen.
12. Konasana 1 & 2
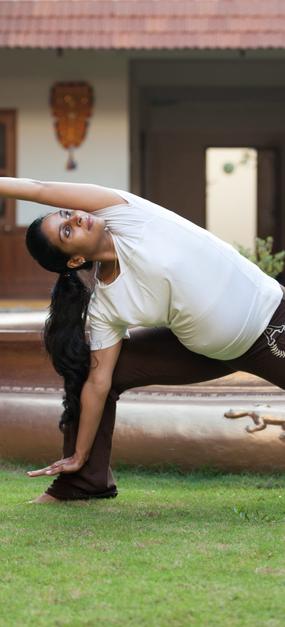
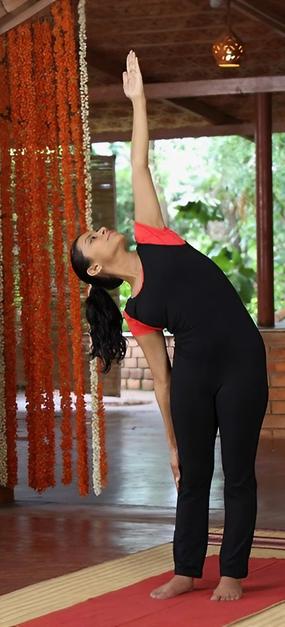
Breathe in, and raise your left arm. Breathing out, bend to the right, and look up at your left palm. Breathing in, come up. Breathing out, bring the left arm down. Repeat on the other side.
Breathing in, lift your arms overhead and join the palms together, interlacing your fingers to form a steeple position. Breathing out, bend to the right. Hold. Breathing in, return to standing position. Breathing out, bring your arms down. Repeat on the other side.
Benefits
Stretches the sides of body and spine, releasing tension and strain.
13. Trikonasana
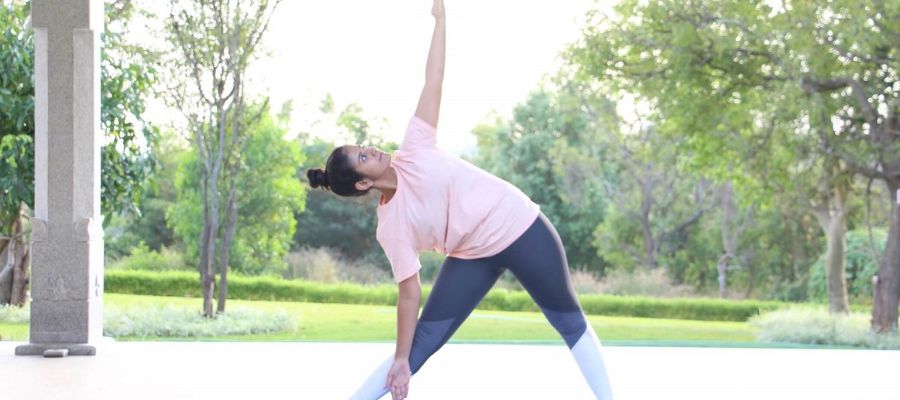
Stand with your feet apart, breathing in, and bring your arms parallel to the floor. Breathing out, extend and bend on your right side to bring the right hand closer to the right foot. Hold. Breathing in, slowly come up, and then relax. Repeat on the other side. read more to how to do Trikonasana.
Benefits
Stimulates and improves blood circulation through the entire body, relieving aches and pains from back, legs and whole body.
14. Virabhadrasana
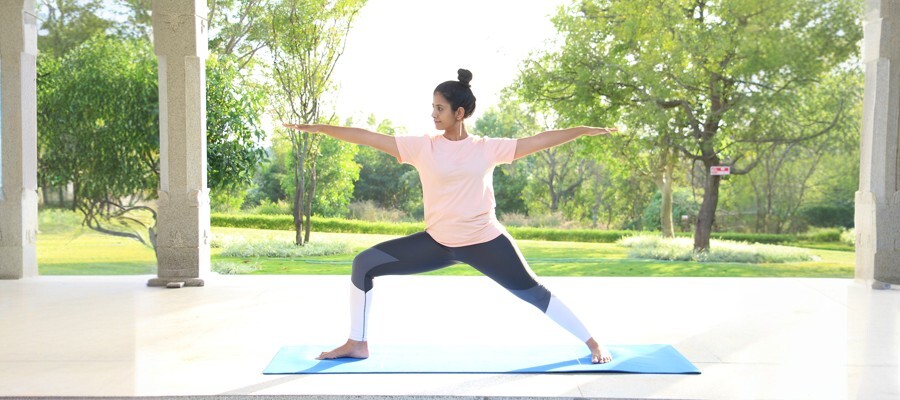
Stand with your feet 3-4 feet apart. Turn the right foot out by 90 degrees, and the left foot in by 15 degrees. Breathing in, lift your arms up to shoulder height. Exhale, and then bend your right knee, keeping it in line with the ankle, and a gently working to bring your right thigh parallel to the ground. Turn the head to the right, and look out across the right hand.
Hold the pose and breathe a few times. Inhale, straighten your right leg, exhale, and bring the arms down. Repeat on the other side.
Benefits
Strengthens ankles, knees, shoulders, arms, legs, and back, and energizes whole body while also generating courage and self-confidence.
more benefits of Virabhadrasana.
15. Utthanasan
Stand erect on your feet about a meter apart, with your toes turned out. Interlock the fingers of both hands and let them hang loosely in front of the body. Slowly bend your knees and lower your buttocks. Straighten your knees and return to the upright position. Repeat this 7-10 times.
Benefits
Strengthens the muscles of the middle back, uterus, thighs, and ankles.
16. Vishnuasana
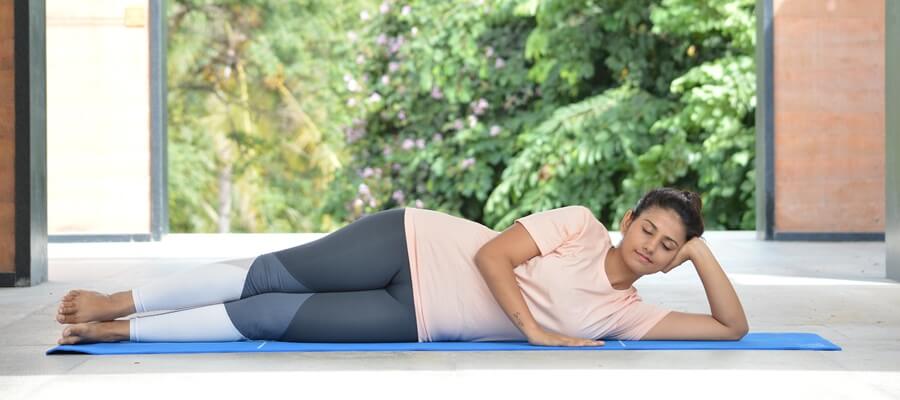
Lie on your right side with your left leg on your right leg. Bend your right arm, placing the elbow on the floor. Support your head on the right palm. Place your left arm on the left thigh. Gently raise the left leg as high as possible, slide the left hand towards the left foot, and grasp your leg wherever your hand reaches. Repeat on other side.
Read more about Vishnuasana.
Benefits
Relaxes the hamstring, inner thigh, and abdominal muscles, and stretches the muscles of the sides of the body, rendering them stronger and more flexible.
17. Markatasana
Lie on your back. Interlock the fingers of both hands and place your hands beneath your head. Bend your knees, keeping the soles of your feet at the side edge of your mat. While breathing out, lower your knees halfway towards the the floor on right side. At the same time, move your head towards the left, giving a uniform, gentle, twisting stretch to the entire spine. While breathing in, bring the legs and head to the center. Repeat on the other side by bending your legs towards the left, and your head towards the right.
Benefits
Eases constipation, improves digestion. Relieves stiffness and strain in the spine caused by prolonged sitting or standing.
Relax with Savasana and yoga nidra, followed by pranayama and meditation.
Breath work and relaxation are an essential part of pregnancy yoga, and can be a special time to connect with your baby. Find out here how to make them part of your daily routine.
Lie on the side of your stomach with your fingers interlocked under your cheek. Support the right cheek over the interlocked fingers. Bend the left leg sideways, and bring the left knee close to the ribs.
Your right leg should remain straight. Turn the arms to the left, and try to touch the left elbow on the left knee. If this is not comfortable, simply rest it on the floor. Rest the right side of the head on the right arm. Relax in the final pose, and after some time, change sides. Your bent knee and head may be supported on a pillow for further comfort.
Get settled in this position, and now is the time to start your Yoga Nidra MP3 and relax even more.
Benefits
Rest often in savasana. This pose stimulates digestion and eases constipation, and relaxes the nerves of the legs. In the later months of pregnancy, lying on the back may cause pressure over major veins and block your circulation. In such circumstances, this posture is ideal for relaxing and sleeping. It also redistributes excess weight around waistline.
Have fun experimenting with what works for you and for your baby.
Happy practicing, Mamas!
This content is not intended to be a substitute for professional medical advice, diagnosis or treatment. Always seek the advice of your physician or another qualified health provider with any questions you may have regarding your pregnancy or associated a medical condition.
By Sejal Shah, E-YRT 500 Yoga Teacher, YACEP, Art of Living Teacher, Mind-Body Wellness Writer, NYU Post Graduate Medical School approved CME retreat facilitator, Homeopath


