Are you just beginning your yoga practice? Or, maybe you’re an experienced yogi? Either way, you can browse our comprehensive library of yoga poses and find what you’re looking for quickly and easily. The library explains basic to advanced poses, including seated, standing, prone, and supine poses (resting). We are also including how to do ten beginner-friendly yoga poses right here to get you started. And to enhance your yoga practice, we also share some yogic breathing exercises. Let’s dive in!
Topics include:
- Understanding yoga and its origin
- The benefits of a good yoga session
- Tips for beginners and advanced practitioners
- 50+ yoga poses, from basic to advanced
- Breathe: Before, during, and after yoga
- Grab your yoga mat and let’s get started
- Try our free 60-minute yoga class online
- Going deeper with the Art of Living
Understanding yoga and its origin
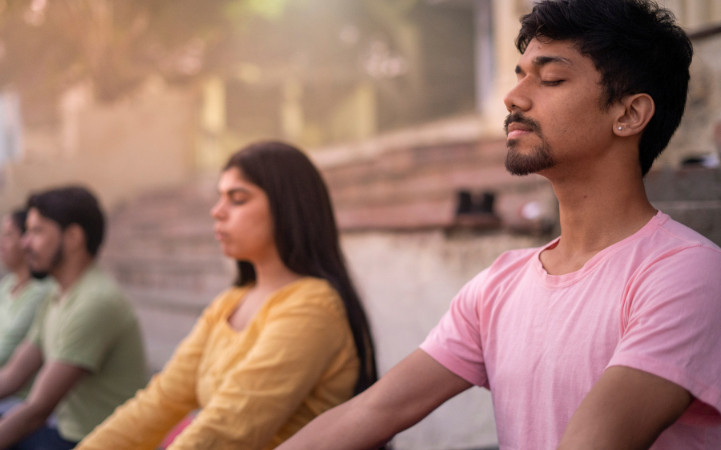
Many people think of yoga as only yoga poses (asanas). In reality, the practice of yoga includes breathwork, meditation, wisdom, and more. Yoga means “union”—the union of body, breath, mind, and spirit.
Yoga, which involves asanas, combines physical exercises and mindfulness, which has benefitted yoga practitioners for thousands of years. Maharishi Patanjali, considered the father of yoga, expounds on the philosophy of yoga and practical applications of all things “yoga.”
In particular, he defines asana as steady and comfortable. This understanding gives clarity on how to make a yoga practice effective as well as enjoyable. Whether it's a child's pose, mountain pose, or even downward-facing dog, we want to find a that space that is steady and stable while also relaxing into the pose. Remembering this in your yoga sessions will provide additional benefits.
At the deepest level, yoga explores the full expression of mind-body integration. We can become aware of the flow of life energy (prana) in the body while practicing each pose. This allows us to go beyond increased flexibility and just a good workout to connect physical steadiness to stillness and evenness of the mind.
Whether young or old, fit or not, yoga can strengthen the body and calm the mind. Even if you can’t touch your toes or do a handstand, you can still practice yoga! Nearly every *body* can practice some level of yoga and reap its many benefits.
There are many kinds of yoga asanas. Hatha Yoga is the basis of these styles of modern yoga, including Iyengar Yoga, Vinyasa Yoga, Sri Sri Yoga, Ashtanga Yoga, Restorative Yoga, Bikram Yoga (hot yoga), and Power Yoga.
Watch this video if you want to learn more about yoga through the eyes of a modern-day spiritual teacher— Gurudev Sri Sri Ravi Shankar.
The benefits of a good yoga session
- Increased flexibility
- Reduces stress and anxiety
- Improved immunity
- Tones muscles
- More inner peace
- Increased stamina
- Improved heart health
- More strength
- Improved emotional stability
- Better posture
- Increased energy
- Improved relationships
- Amplifies intuition
- Better sleep
- Weight loss
- Chronic pain relief
- Read about these benefits here
Tips for beginners and advanced practitioners
- Practice on an empty stomach
- Do a little warm-up to start with (walking in place)
- Do not force yourself into any pose
- Practice breathing exercises before, during, and after your yoga session
- Practice mindfully with awareness of the mind and body
- Regular practice gives maximum results
- For more tips, click here
50+ yoga poses, from basic to advanced
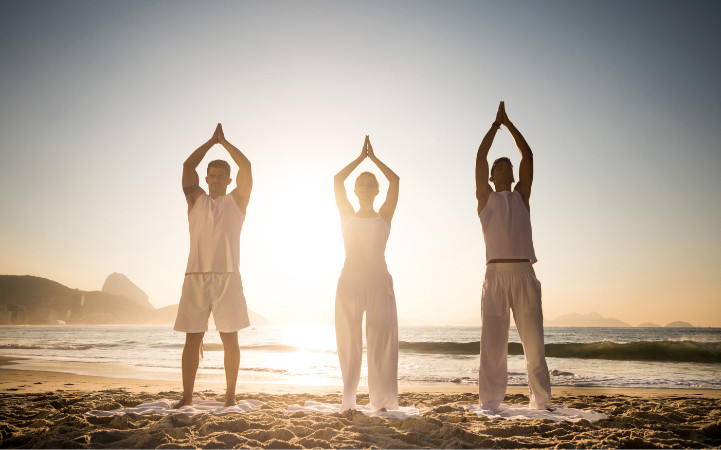
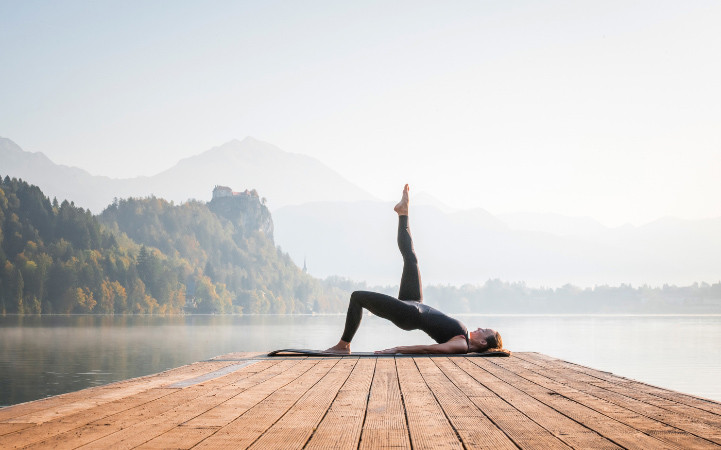
A beginner yoga student might feel overwhelmed by the sheer number of poses, and their odd-sounding names. There's the triangle pose (Trikonasana), bridge pose (Setu Bandhasana), mountain pose (Tadasana), tree pose (Vrikshasana), and hundreds of other poses.
To simplify, we have the most popular and beneficial yoga poses and sequences and their English and Sanskrit names. However, it is NOT necessary to know the Sanskrit terms to practice yoga.
Click on the pose's name to learn more about it—level of difficulty, the step-by-step instructions on how to do it, the benefits, precautions, modifications and variations, preparatory and follow-up poses.
Poses are listed A to Z for each category.
English Name | Sanskrit Name | Level of Difficulty AndMain Benefit |
Standing Poses
| ||
Beginner Back | ||
Beginner Back | ||
Intermediate Hips, legs | ||
Intermediate Hips, legs | ||
Beginner Spine, legs | ||
Intermediate Chest, upper back | ||
Beginner/Intermediate Chest, arms, shoulders | ||
Beginner/Intermediate Back, hamstrings, nervous system | ||
Beginner Spine, waist | ||
Intermediate/Advanced Back, hamstrings | ||
Beginner/Intermediate Entire body | ||
Beginner/Intermediate Hips, legs, balancing pose | ||
Beginner Hips, legs, digestion, full-body stretch | ||
Beginner Hips, legs, arms, shoulders, back | ||
| ||
Seated Poses
| ||
Beginner Digestion, posture, thighs, legs | ||
Beginner Inner thighs, hips, menstrual discomfort | ||
Intermediate Chest, abdomen, back | ||
Beginner Back, abdomen, wrists, digestion | ||
Beginner Back, digestion, nervous system | ||
Beginner Hamstrings, hips, pelvis | ||
Downward Facing Dog Pose (or Downward Dog) | Beginner Spine, upper body, leg muscles, anxiety, headache | |
Beginner Hips, back, posture | ||
Beginner Spine, back, chest, lungs | ||
|
(or Cow Pose) | Beginner/Intermediate Shoulders, things, spine, sciatica | |
Beginner/Intermediate Wrists, arms, shoulders, back, spine, chest | ||
Intermediate/Advanced Hips, pelvis, posture, digestion | ||
Beginner/Intermediate Entire body, mind, soul | ||
Beginner Back, abdomen, hips, sciatica, menstrual discomfort | ||
Intermediate/Advanced Hips, things, legs | ||
Beginner/Intermediate Lower back, abdomen | ||
Beginner/Intermediate Lower back, abdomen | ||
| Pigeon Pose or One-Legged King Pigeon Pose | Beginner/Intermediate Hips, legs, posture | |
Beginner Abdomen, back | ||
Beginner/Intermediate Spine, chest, lungs, digestion | ||
|
|
|
Beginner Neck, shoulders | ||
Beginner All joints and muscles of the body | ||
| ||
Prone (Lying on Belly) Poses
| ||
Beginner/Intermediate Abdomen, back, reproductive organs | ||
Beginner Arms, chest, abdomen, wrists, digestion, backache | ||
Beginner Back, stress relief, relaxation | ||
Beginner Spine, back, shoulders, arms | ||
Beginner Spine, chest, shoulders, stress relief | ||
Beginner/Intermediate Chest, shoulders, arms, legs, abdomen, lower back | ||
Beginner/Intermediate Back, arms, wrists, posture | ||
| ||
Supine (Lying on Back) Poses
| ||
Beginner/Intermediate Back, abdominals, arms, hips, hernia | ||
Beginner Back, spine, neck, chest, kungs | ||
Beginner Stress relief, relaxation | ||
Beginner/Intermediate Chest, lungs, upper back | ||
Beginner Stress relief, relaxation, back pain | ||
Beginner Spine, back | ||
Plow Pose (or Plough Pose) | Intermediate Neck, shoulders, abs, back, thyroid | |
Intermediate Neck, shoulders, abs, back, thyroid | ||
Intermediate/Advanced Arms, legs, spine, abdomen, chest | ||
Beginner Back, abdomen, gas, digestion | ||
| ||
Lying on Side Poses
| ||
Side Reclining Leg Lift Pose or Lying- down on sides | Vishnu Asana or Anantasana | Beginner/Intermediate Pelvis, inner thighs |
Breathe: Before, during, and after yoga
Breathwork and yoga go together like peanut butter and chocolate! Both are great by themselves, but together, they are amazing!
Try alternate nostril breathing to center yourself before your yoga practice. Here’s an easy-to-follow video.
The best breathing exercise during your yoga practice is ocean breathing, also known as Ujjayi or victory breath. Victory breath has many benefits and ways to utilize it. Watch this video to learn everything you need to know about this amazing breathing technique.
To follow your yoga practice, you can repeat alternate nostril breathing or learn other pranayamas (breathing exercises) on the Art of Living Part 1 course featuring SKY Breath Meditation.
Grab your yoga mat and let’s get started
Out of these 50+, here are the top 10 easy yoga poses for a beginner. Roll out your yoga mat and get ready for some gentle body stretching!
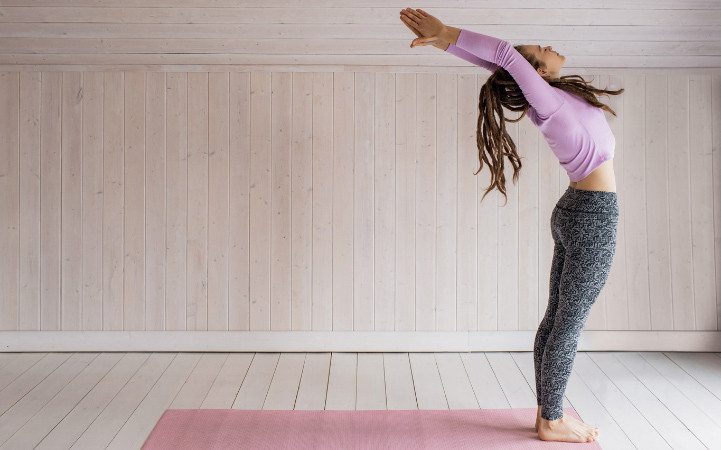
Stand straight with both feet together and arms alongside your body.Balance your weight equally on both feet.
Breathing in, extend your arms overhead with your palms facing inwards.
Breathing out, gently bend backward, pushing your pelvis forward and keeping your arms in line with your ears and elbows, keeping your knees straight.
Keep your head up and lift your chest towards the ceiling.
Hold the pose and breathe deeply.
Breathe in, and slowly come back up.
Breathe out, lower your arms, and relax.
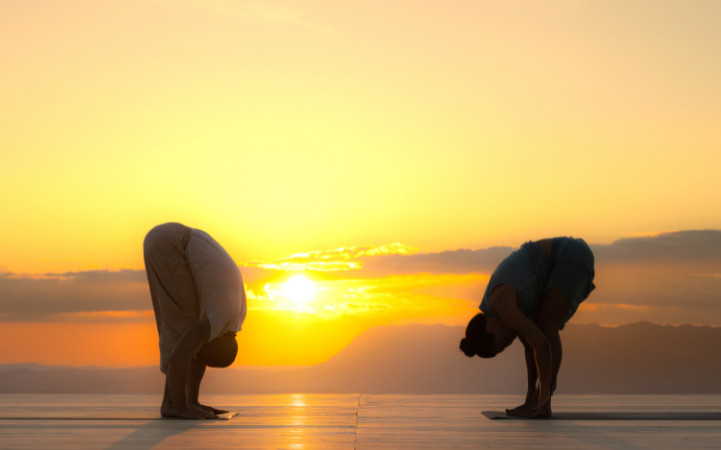
Stand in Mountain pose. Keep your legs 3-4 feet apart.
Make sure that your feet are parallel. Your toes can be pointing slightly inward, creating pigeon toes.
On an inhale, lift your arms to your sides, bringing them parallel to the floor.
Exhale and bend your torso forward from your hip joints, maintaining a straight spine.
Place your hands on the floor underneath your shoulders when your torso is parallel to the ground.
Lifting your hips, bend further as you breathe out to bring your head toward the floor between your hands.
Engage your thighs, activating your quadriceps.
Press your hands firmly on the floor to deepen the bend. If your hands reach the feet, grab your big toes and pull on them to get a deeper bend, bending your elbows.
On an inhale, stretch your arms to the sides and slowly lift your torso, maintaining a flat back.
On an exhale, lower your arms to your sides and return to the Mountain pose.
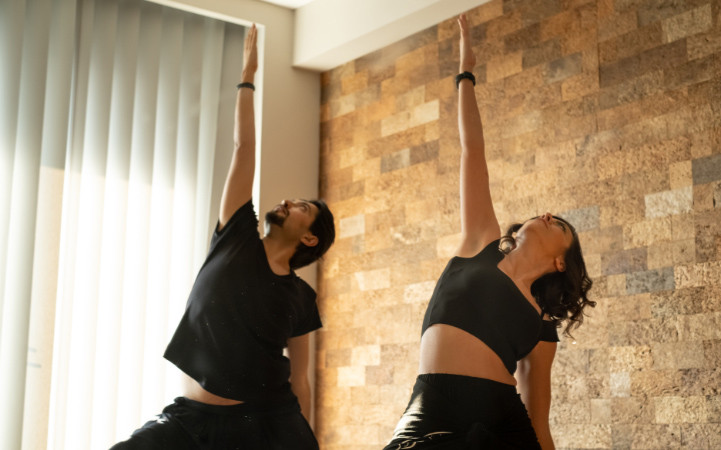
Stand straight with feet hip-width apart. Hold your arms alongside your body.
Breathing in, raise your left arm. Keep the fingers of your left hand pointed towards the ceiling. Feel a nice opening in your left shoulder.
Breathing out, bend to the right. Keep your chest facing forward and your left arm pointing up. Keep both knees straight.
Turn your head to look up at the left palm. Hold your torso at a steady angle towards the right. Straighten your elbows. Notice the stretch in your left leg, keeping your left foot on the yoga mat. The stretch should affect each leg joint.
Breathing in, straighten your body back to the center.
Exhale as you bring the left arm down. Notice any changes in your sense of arm balance as you inhale and exhale again.
Repeat the above steps with the right arm.
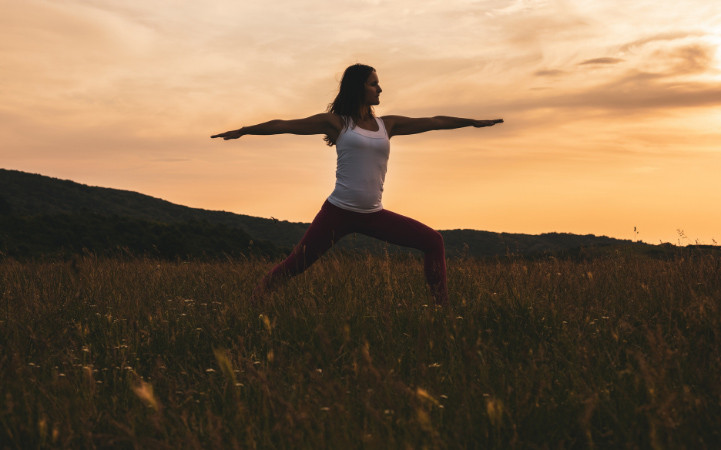
Stand up straight in mountain pose with your feet hip-width apart and your arms by the sides of your body. Breathe deeply and draw your awareness inward.
Separate your legs wide apart at a distance of at least three to four feet.
Turn your right foot out at 90 degrees and your left foot in at 15 degrees, or keep it straight with your toes pointing forward.
Align the heel of your right foot with the center of your left foot.
Turn your upper body to the right.
Breathe in and reach your arms up, keeping your hands shoulder-distance apart and your palms facing each other. Allow your shoulder blades to open out and up slightly. Keep your gaze forward. You may bring your palms together and look up at your thumbs.
Exhale, and with your arms raised, bend your right knee and bring your right thigh parallel to the floor, feeling the stretch in your thigh and hip.
Keep your right knee above your right ankle. Make sure that the knee does not extend beyond the ankle. Keep the back foot grounded and the back leg straight without bending at the left knee.
Stay in the pose for about five to ten breaths. If you like, you can extend your spine slightly backward, like in a crescent moon. Breathe evenly.
Breathing in, straighten your right knee. Breathing out, bring your arms down.
Repeat the pose on the other side.
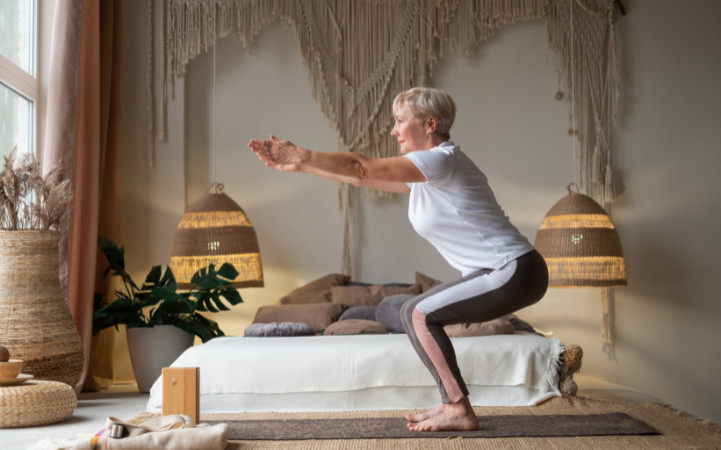
Stand up straight with your feet together or hip-width apart and parallel to each other on the yoga mat.
Reach your arms straight out in front of you with your palms face down, or bring your hands together over your head with arms straight. Your shoulder blades should be drawn back and down.
Bend your knees deeply and sink your pelvis toward the ground like you are sitting in an imaginary chair.
Make sure that your knees align with your ankles and toes, with the weight of your body on your heels.
Do your best to remain comfortable and calm while maintaining the posture. A burning sensation in your quadriceps is normal.
Inhale deeply to lengthen the spine and sink your tailbone further down on every exhale.
Hold the posture for 30 to 60 seconds.
To come out of the posture, breathe in and stand up straight or sit on the mat.
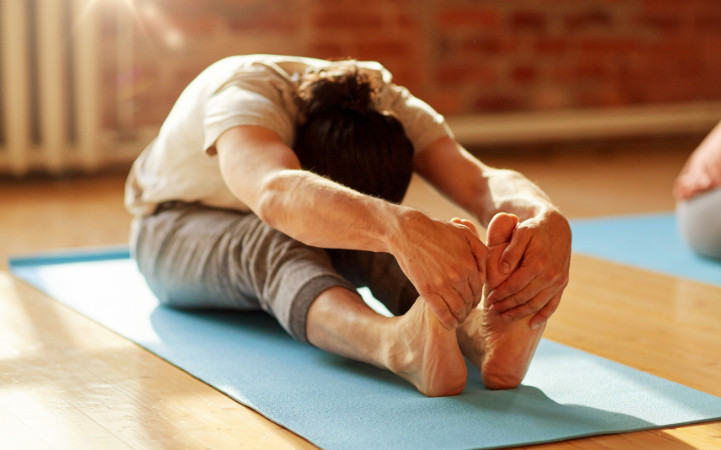
Sit on the floor with your legs stretched in front of you, keep your spine erect and your toes flexed towards you.
Breathing in, raise both arms above your head and stretch upwards.
Breathing out, bend forward from your hip joints, and lead with your chest towards your toes.
Keep your spine erect and focus on moving towards your toes rather than down towards your knees.
Place your hands on your legs or wherever they can comfortably reach.
Breathing in, lift your head slightly and lengthen your spine.
Breathing out, gently move your navel towards your knees.
Repeat this movement two or three times.
Stretch your arms out in front of you. Breathing in, come back up to a sitting position.
Breathe out and lower your arms.
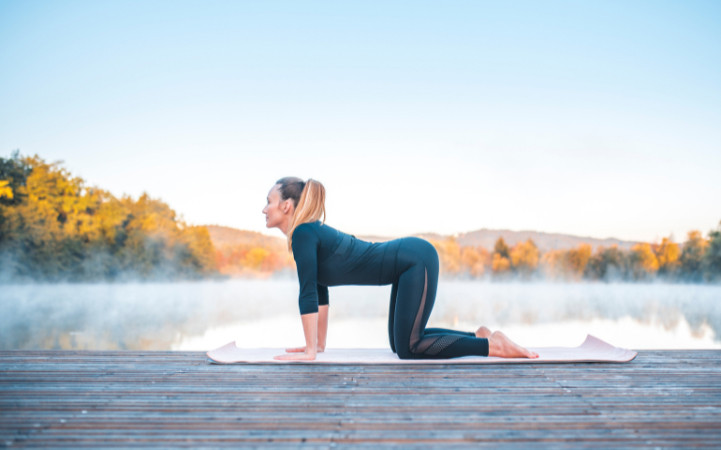
Come onto your hands and knees, forming a tabletop position.
Keep your arms perpendicular to the floor with your hands directly under your shoulders and flat on the yoga mat with your knees hip-width apart.
Look straight ahead, taking a deep breath and letting it go.
The next time you inhale, raise your chin, tilt your head back, push your navel downwards, and raise your tailbone. Compress your buttocks.
Hold the cow pose and take long, deep breaths.
As you exhale, drop your chin to your chest and arch your back up as much as you can, assuming the position of a cat with an arched back.
Relax your buttocks.
Hold the cat pose for a few breaths before you return to the tabletop position.
Continue for five or six rounds, inhaling for cow pose and exhaling for cat pose, before coming out of the postures.
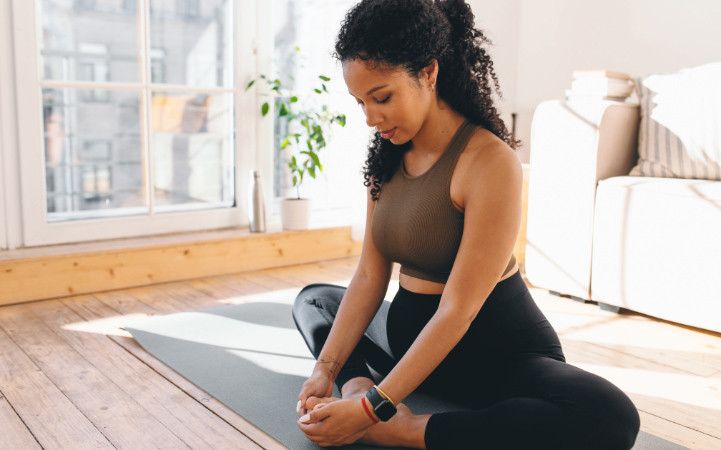
Start in a seated position with your spine erect and legs spread straight out.
Bend your knees, and bring your feet towards your pelvis.
The soles of your feet should touch each other.
Grab your feet tightly with your hands (you may place your hands underneath your feet for support).
Make an effort to bring your heels as close to your groin as possible without straining.
Take a deep breath in.
Breathing out, fold forward, and press your thighs and knees toward the floor.
Make a gentle effort to keep pressing your thighs downward.
Start flapping both your legs up and down like a butterfly's wings.
Start slow, and gradually increase the speed. Continue to breathe normally.
Slow down and then stop.
Take a deep breath in, and as you exhale, bend forward, keeping your chin up with a straight spine.
Press your elbows on your thighs or your knees, pushing your knees and thighs closer to the floor.
Feel the stretch in your inner thighs, and take long, deep breaths, relaxing the muscles more and more.
Take a deep breath in and bring the torso up.
As you exhale, gently release the posture.
Straighten the legs out in front of you and relax.
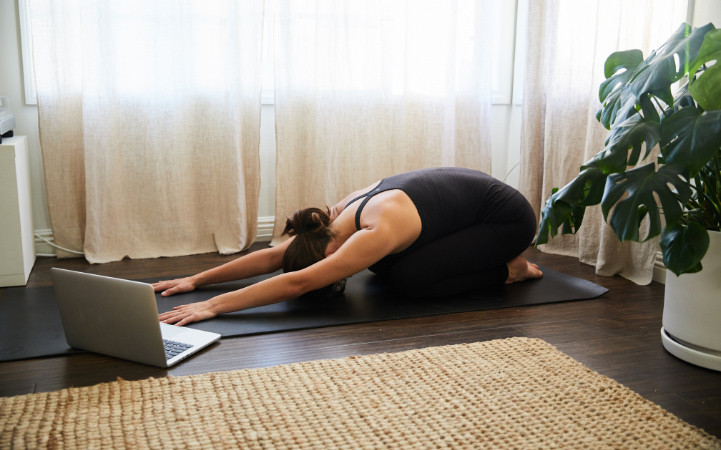
Sit on your heels. Keep your hips on your heels. Exhale while bending forward, and lower your forehead to the floor.
Keep your arms alongside your body with your hands on the floor, palms facing up. (If this is uncomfortable, place one fist on top of the other and rest your forehead on it).
Gently press your chest on your thighs, holding the pose, and continue to breathe.
Inhale as you slowly raise your abdomen, uncurling your spine vertebra by vertebra, and come to sit on your heels.
Final pose after all yoga sessions
Yoga Nidra is known as non-sleep deep rest and allows the body to rest and engage the parasympathetic nervous system. Enjoy this guided version by meditation master Gurudev Sri Sri Ravi Shankar.
Try our free 60-minute yoga class online
Experience the profound ways Sri Sri Yoga can enhance every aspect of your life and mind-body health with calmness, wisdom, resiliency, and strength. Attend a free online introductory yoga class with a live yoga instructor to learn more. Our online yoga studio offers other yoga classes as well. You can explore here.
Also worth noting is our 200-hour yoga teacher training, which provides a beautiful platform to learn all the fundamentals of yoga poses in great detail. Even if you’re not sure you want to be a yoga teacher, this program is worth taking just to enrich your yoga practice.
Going deeper with the Art of Living
For those who want to go deeper into their yoga practice, it is highly recommended to integrate breathwork and meditation. The Art of Living Foundation offers both mantra-based and breath-based meditation. Most people start with the Part 1 course, though you may choose to learn the mantra-based technique first if you wish. Either way, you will find that the Art of Living has a multitude of programs that will enhance your yoga journey!

